Wednesday, October 15, 2008

Stampin UP Tag Starburst

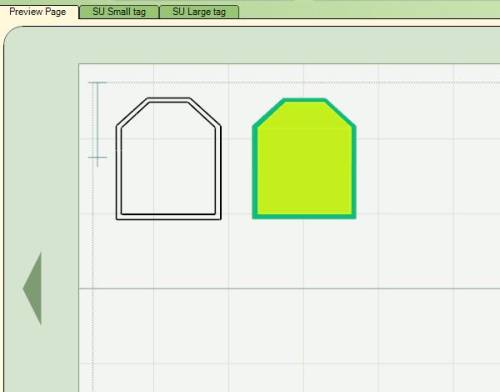
Someone on the Cricut Messageboard pointed out a Starburst made with the Stampin Up Tag set. Since I had just made that file I thought I would be able to fix it to where you can make one. And ya know what.......I DID! LOL

The file is SU TAG STARBURST. The important thing to remember is that there are two mats that will be cut and the instructions below are very specific for this to work right.

Load your paper.
Click cut for the first mat.
Once it is cut then click LOAD PAPER (do not unload your paper or it will not work).
This will set it back to the starting point.
Click to your second mat and then click cut.

You will end up with this


Remove the pieces from the mat. I left the frames on there so you could see. Please ignore my dirty mat. I need to wipe it down but have been using it for cutting the last two days. That zig pen method really works good for resticking your mats!!


Next you will want to line up four of the frames. Okay so my file is a hair off. But you can overlap them to get the perfecdt if you want. I was in a hurry and wanted to get this on my blog so I didn't take time to overlap. I used a scrap of pearlescent vellum I had to glue the frames to.


Next lay your other four frames on top of the first set like in the picture here.


And lastly cut way the areas show in the this picture.


And this is what you will end up with. Like I said the file I made is a hair off but I think with some overlapping it will line up better and not have the gaps in the center.

I just want to say thank you!!

I totally appreciate everyone leaving comments!! Before I put out this latest set of .cut files I would get a few comments. I know people were downloading the files because AMKscrap would email me the stats. It does get discouraging when a file has like 500 downloads and only 3 comments. But you guys are leaving comments now! YEEHHAA!! It is greatly appreciated!!

Soo.....THANK YOU THANK YOU THANK YOU!!!

Tuesday, October 14, 2008

THE SU REPLICA TAG SET WORKS!

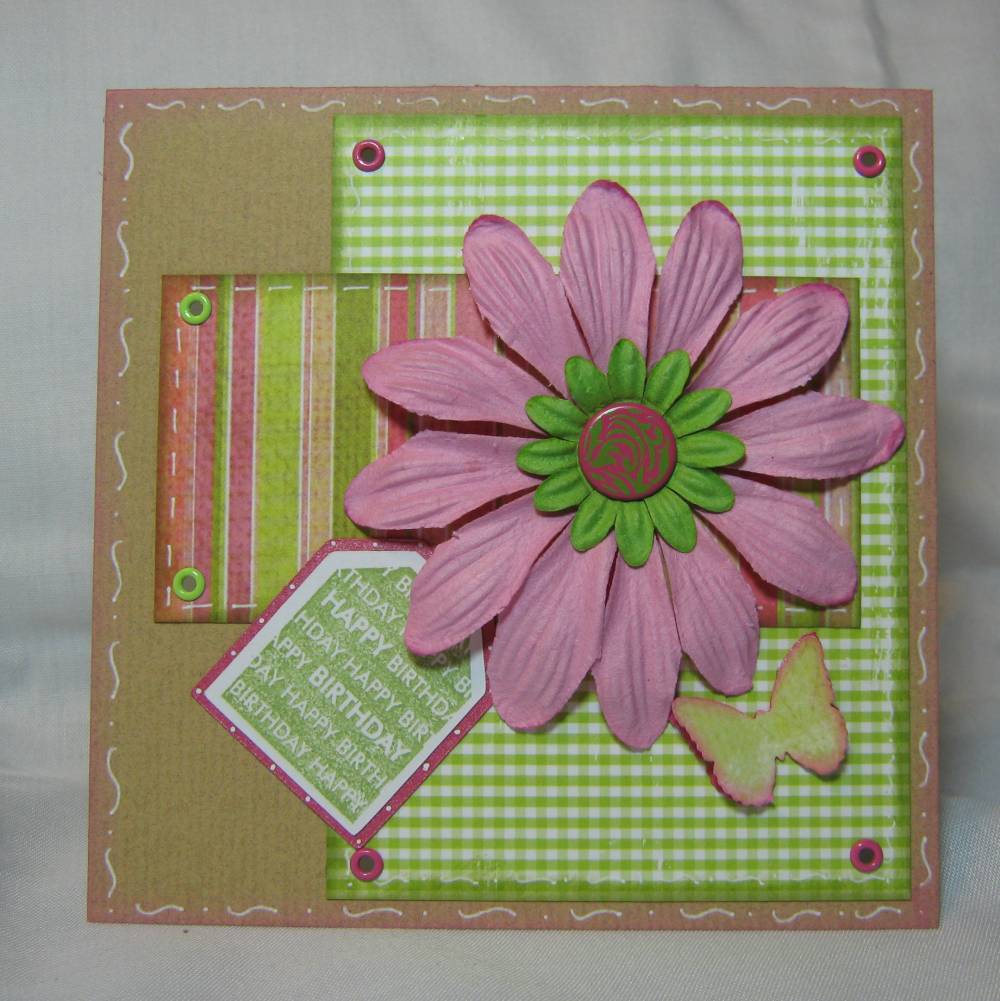
I couldn't resist! I just couldn't! I just had to try the tag set. I had gotten the Stampin Up Tag Set at the stamp garage sale a few weeks back and haven't really played with it because I wanted to get the smaller tag punch. I thought I should make a card to see if the .cut file I made worked, especially since I already posted the file for download. IT DID IT DID!! *okie says beaming with pride*

Since I don't have the small tag punch I couldn't compare but I did with the large tag punch I have and I got it within a hair of being exact!

The birthday stamp was part of the set I got. I did have some problems lining up the stamp, but I used one of the better ones for the card. The flowers are prima and the brad in the middle is one I got from Eyelet Outlet. The butterfly punch is Martha Stewart *okie wonders if Martha even knows she offers this punch*. I have no idea what the paper is as it was some more scrap I had. I did use some mica for the large tag and the bottom layer of the butterfly, but you can't really see it. I really like this card! You can click on the picture for a closer look.

Stampin Up Tag Set Replica - DOWNLOAD NOW!

I guess I should have used the STAMPIN UP TAG SET REPLICA to make a card tonight instead of the designer label. That is what I get for not checking the poll! LOL

I will try to get some cards made with this one tomorrow since I do have 12 stamps that go with this.

Like I said before.....this is the file that started all the latest .cut file designs I have done. I have the punch for the large tag but not the small tag and didn't want to spend the money on the small tag right now.

Two Fall Cards

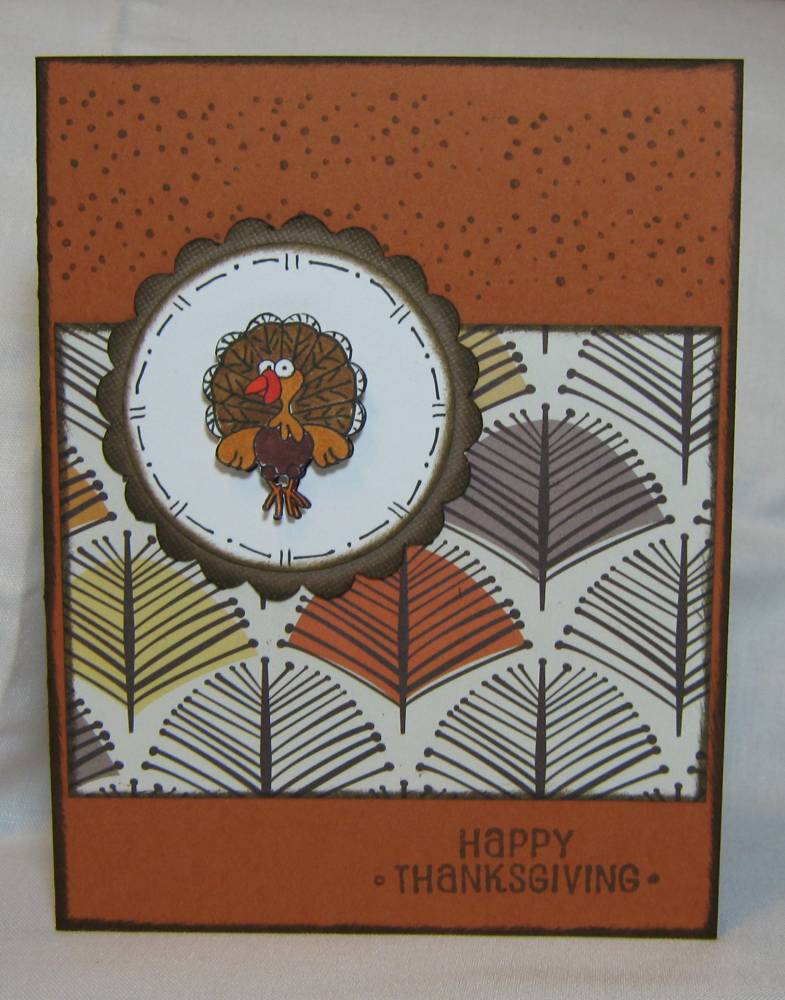
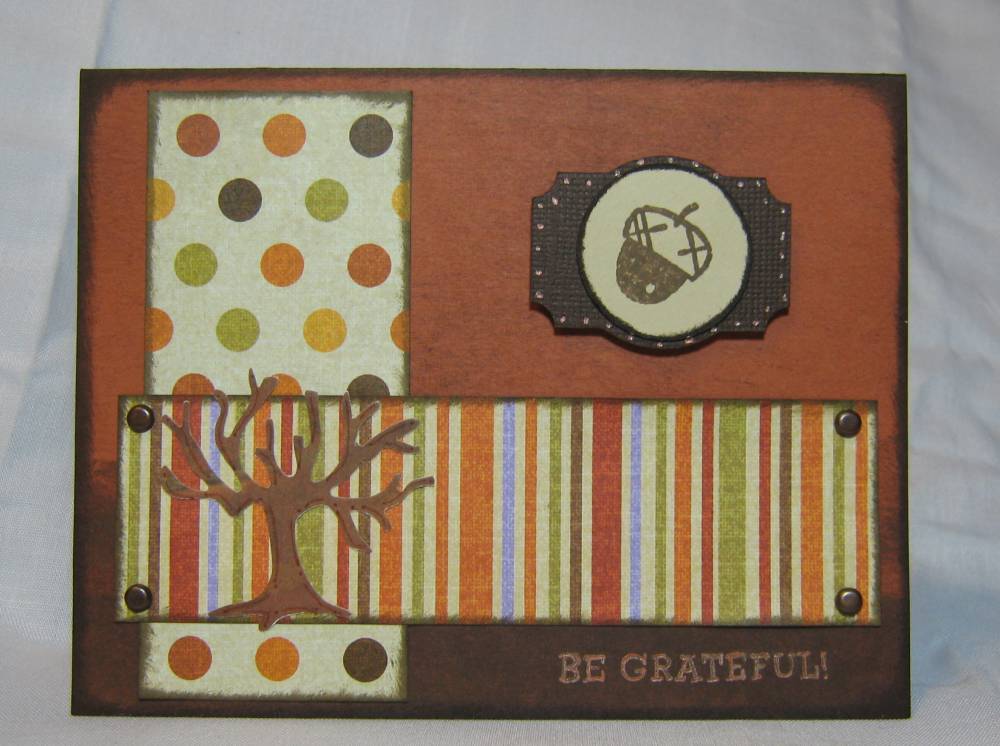
I was able to make two cards tonight. Don't really like them but I was trying to solve a crime at the time! Have you guys watch the show The Mentalist? Oh gosh I am really like it! And MAN ON MAN that guy is a hottie!!

Oh back to the cards.

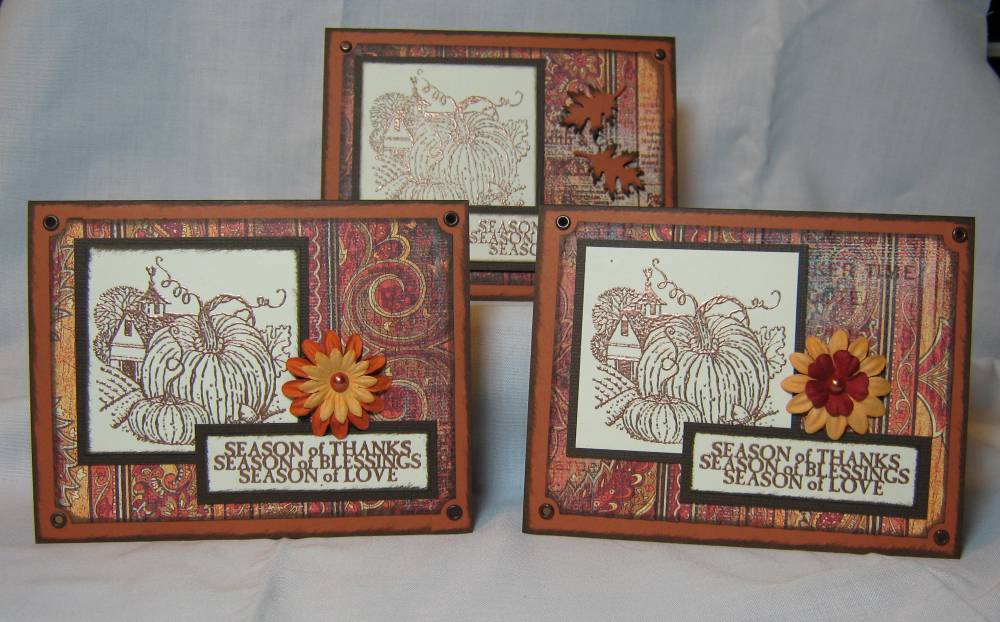
This one is a Thanksgiving card. I did add the dots with a little Sugar Loaf stamp I have. The turkey and Happy Thanksgiving are Studio G's. The tree paper is just a piece that I got in the scrap box that my LSS owner gave me. The scallop circle is one that I did quite sometime ago, it isn't th new version that I did.


This card is one I just wanted to try the designer label .cut file on. I did make a small circle to fit in the label to stamp the acorn on. Not sure I like the card but I do like the papers at least HA HA HA The tree is from a Marvy punch that borrowed from my LSS owner.

OOPPSS!! Scallop circle problem.

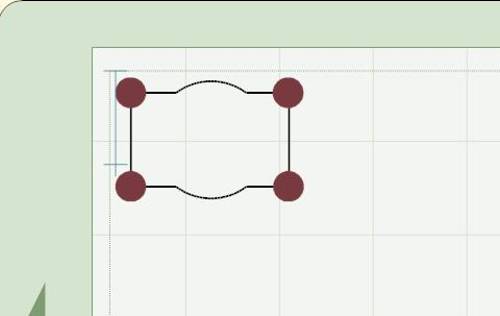
It was pointed out to me that the circle wasn't cutting right. I forgot to delete a big circle I had put in the middle when I was doing the screenshot. So you will need to go in and delete that on the mat and then save the file.

Click a small circle until your editing handles appear.
Slide the scallop shape over.
Delete the plain circle
Save your file.

And that should fix it.

I have changed the file in the original post if you just want to download it again.

Monday, October 13, 2008

Adjustable Scallop Rectangle - DOWNLOAD NOW!

The ADJUSTABLE SCALLOP RECTANGLE is the last of the basic shapes. I really appreciate all the support you guys are showing for these files!! It honestly makes it worth the time an effort. I know myself like other DS designers appreciate the little support you can show us through our blogs.

I will be releasing the Stampin Up punch duplicates this week also!!


As a bonus tonight I am also adding the ADJUSTABLE SCALLOP HEART .cut file available. Thanks to my friend LacyGilbertson I made this one tonight. She asked if I could do a heart one.

Adjustable Scallop Oval - DOWNLOAD NOW!

I really like the ADJUSTABLE SCALLOP OVAL but then again I like all scallop shapes. And ya know what. I even like to eat scallops....but the seafood kind of course.

I think I forgot to mention, but I think you guys already know that I used George for creating the file set.

If you guys wanted to create a frame from any of them all you would need to do is set your size of cut out for the middle, line it up and then leave it on top of the scallop shape. Just make sure that it is NOT welded.

Thank you all for the wonderful comments about the files. I have gotten a few messages about how I was able to make the files. To be honest I am not good at explaining things. However, Capadia has a great tutorial on her blog at Capadia Designs that explains how to use some of the new features with the most recent Design Studio update. If you hop over there why not show her some support and check out her page sponsors as well! Cap is a great designer and shares some fantabulous .cut files! I hadn't checked out her blog in awhile but she also has a scallop circle that is adjustable. If I had known that I could have saved myself a few hours LOL.

Sunday, October 12, 2008

Votes are in!! Scalloped Square - DOWNLOAD NOW!

The votes are in and the ADJUSTABLE SCALLOP SQUARE won by one vote!! But ya know only one vote is all it takes *okie cracks up laughing*. This is so much fun for me...maybe not for you guys.....but for me....*okie laughs again at herself*.

I am just wondering if you guys are enjoying the suspense? Shoot I now know what Provo Craft feels like when they are getting to release new products! IT'S SO COOL!!

Adjustable Scallop Circle - DOWNLOAD NOW!

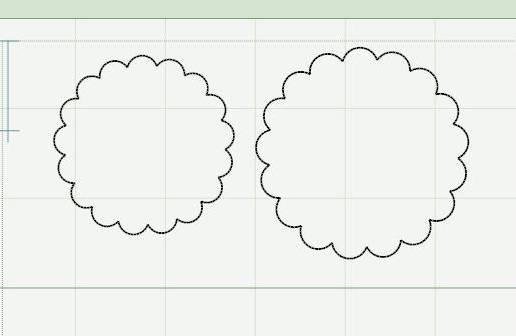
Here is the first release! It is the ADJUSTABLE SCALLOP CIRCLE .cut file. You can copy and paste the whole image and fill up the mat if you wish. You can resize it bigger or smaller. I am including the screenshot again just so you can be sure you know which file you are downloading. There are two included on the screenshot but there is only one on the file. But like I said you can totally copy and paste the whole image and fill up the mat.

DO YOU GUYS REALIZE HOW EXCITED I AM ABOUT THIS?? I can't even begin to describe how excited!!

INTRODUCING.....

The brand new totally re-sizable, adjustable, multiplicative shapes!! After working for hours yesterday....and maybe an hour today I was finally able to get scallop shapes made that have the flexibility we cricut lovers just HAVE TO HAVE! LOL

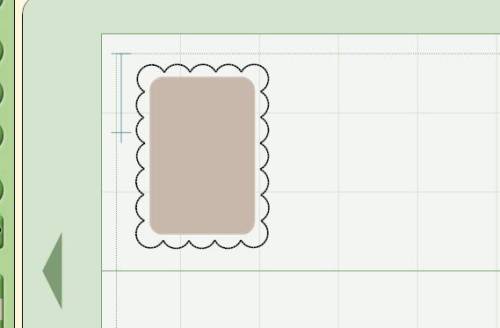
I did Stampin UP punch duplicates that are as close as 1/16th of an inch correct. You can resize them if you wish but they are set in the file to be cut at the size of the punch. And then I also did a set of basic scallop shapes that we all love!!

Here is the scallop oval. You can resize the inside oval and also the scallop oval, as you can with each of the files, if you need to. Just do the copy and paste and fill your whole mat with the shapes!


And next we have the scallop circle. I forgot to do the inside circle during the screen shot but it is on there.


This is the rectangle shape. I like this one for cards. I have one I did in various sizes that I use a lot with Studio G and Inkadinkado little stamps quite often but could only cut one at a time since it was do difficult to copy and paste each individual circle.


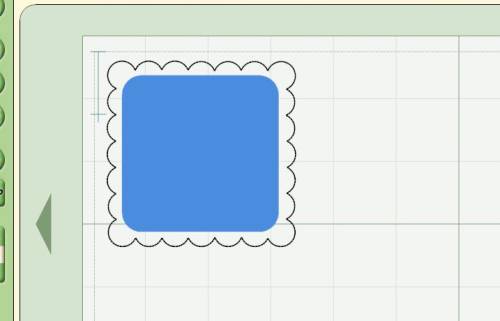
And then we have the scallop square. Yet another good one for the small stamps. But now you can even use bigger stamps, or at least I can. I will so love being able to cut a whole mat of these to have on hand!! I know Enfys says she cuts her most used colors to have handy when she is making cards, that woman is just too smart and too talented!!


These next screenshots are the Stampin Up punch duplicates. And it is actually how I got started on all this. I recently bought a retired set at a garage sale of the Tag punch and stamps and loved them. I thought "dang I need the smaller tag but I don't have the money for the punch right now". Who knew one little cut file was going to lead to all of this! I wanted to see if I could make it where I could copy and paste the whole image. Once I got it figured out I thought I would do the large tag. And then that lead to the scallop circle, square...etc. Then I decided to do basic scallop shapes.....anywho...that is how all this started *okie watches everyone going to sleep during the story she is telling* HEY YOU GUYS WAKE UP!! THERE ARE MORE SCREEN SHOTS TO LOOK AT!!

Oh yes...back to the tag set. Here it is. I have the 12 stamps that were made for this set. I got a really good bargain on them. I tell ya I am really liking Stampin Up products! They are pricey in my book but with these it honestly is getting what you pay for. The images are always so crisp!


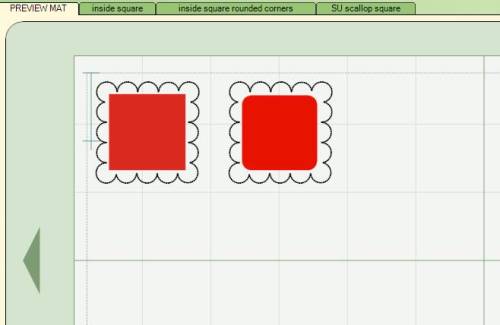
And this is the Stampin Up scallop square duplicate. I did a rounded corner and regular corner for this. I like rounded corners myself. While I don't have any stamps for this punch yet I have been looking through my catalog at some. I think I will need a Stamp Ma Jig *okie wonders if that is what it is called* that will help me line up my stamps. My friend Scrappinbee says she has one and just loves it!!


This is the Stampin Up scallop circle....14 bumps, just like the punch!! I do have to say I love circle stamps. I don't know why but I just think they are adorable!!


While I don't have any of the designer label Stampin Up stamps I do like the looks of the punch, and who knows, one of these days I might get the stamps to go with it. Now on this one it is a two layer. I couldn't get the circles to do the ticket type punch in the label design. The whole welding thing...*okie looks as some of the faces seem to have a look of "huh?? what??" on them*. Not sure how to explain it. But anyway the circle corners will have to be overlayed on top of the label base to get the ticket corner punch effect.


As I posted on the Cricut message board I will be releasing each file. But will do so one at a time *okie laughs a wicked evil laugh*. Figure if we all get excited about new releases we can get excited about .cut file releases too! Well except me...I already have them don't I! HA HA HA HA HA

Each time I do post a file for download it will have it's own post and be clearly labeled for download so you know which one is being released. Are you excited yet?? I KNOW I AM! I will be releasing AT LEAST one today!!

Thursday, October 9, 2008

I LOVE HEAT EMBOSSING!!

I liked heat embossing before but I was such a messy embosser! I would have little splatters of powder on stuff I was trying to emboss and it just looked like.......well to be perfectly honest it would look like CRAP! *okie makes a very sad face*. People on the Cricut message board would talk about an embossing buddy and how wonderful it was. I got to make my first ever Stampin Up order and one of the things I ordered was an embossing buddy.....MAN OH MAN I AM IN LUV!!!

Tonight was the first night I have gotten to try the embossing buddy. I decided to play around with the stamp set I got and try some embossing. Let me tell you that little pillow of white dust stuff sure made a HUGE HUGE difference! For the first time ever I got a clean crisp embossed image! You can click on the picture for a close up shot and see for yourself.

So the embossing buddy is my tool of the month recommendation!!


I didn't do any embossing on the envies but I did use one of the stamps that came with the set to jazz the envies up a bit. I think the leaves gave the envies just the little bit of extra to tie them to the cards.

I do have to say I am really liking the Stampin Up stamps. They stamp wonderfully!! *okie sighs deeply as she realizes her first order will not be her last*

Sunday, October 5, 2008

Organization is becoming my middle name

I went to the stamp sale. I only bought one stamp. But I stocked up on cardstock for card making. I bought like 300 sheets of 8.5x11 card stock and I think like 300 A2 card bases. And some other odd sizes too. I got some Mica card stock.....OMG it is BEE U TEE FULL!! It is kinda like the Bazzill bling but without the texture and is blinged on both sides, and very thick. It works great in the Cuttlebug too! I also bought 300 A2 size envies.

The prices were CHEAP CHEAP CHEAP!! The 300 sheets of card stock cost me 12 bucks! WOW WOW WOW! Packs of envies were $1 for 25...and they are quality and colored.

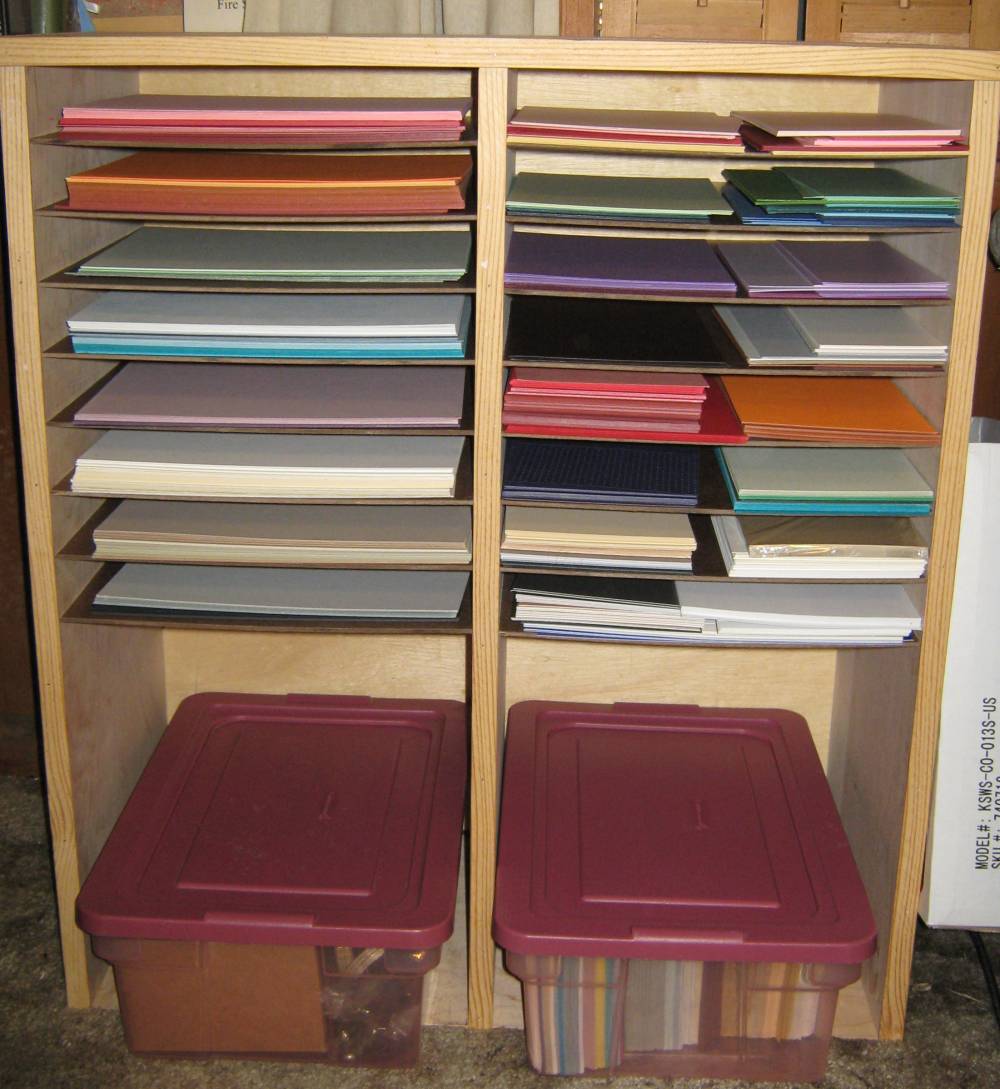
Well with the help of Scrappinbee I got my goodies all organized! THANK YOU SCRAPPINBEE!! This is the paper shelf with the card making stuff in it. I previously used this shelf for my 12x12 but my paper out grew it. Now I am glad I still have it because I can keep card stuff separate from my scrappin stuff!One side has the 8.5x11 card stock and the other side has the pre-cut sizes.


I then needed to organize my envies. I had some odd sizes already because I buy packages of invitations and note cards when they are on clearance just so I can have the envies. Scrappinbee helped me figure out what size cards I need to make to fit in those envies. This is the container that probably has about close to 1,000 envies in it...SERIOUSLY! I made labels so I can know what size card to make for the envie. I didn't bother with 1/8" measurements for trying to cut cards. I rounded them down to the closest 1/4" inch measurement of needed, but some are only 1/8" smaller than the envie.

Here is a picture of the the labels with the card sizes on them that separate the envies.
The envies are cram packed in there but at least I was able to get them in one container. If I had one more envie I would be in trouble.


I keep tellin ya'll I organize more than I scrap!! ROTFLMAO

Saturday, October 4, 2008

Halloween cards....again....

I said I was done making Halloween cards. But evidently I lied! HA! My LSS owner asked if I would make some to display for her store, so I did.

A few of these I don't even like. I think they are hideous, but she liked them.....I am beginning to wonder about her taste! *okie cracks up laughing*. These are two that I think are AWFUL! The felt cut outs came in a pack. I like the felt cut outs, just not what I did with them. The ghost is hand cut. I ran some cardstock through my Xyron 250 and then put material over the sticky side and cut out the ghost. I added stickles. HE IS UGLY!


This one is okay I guess. The brads are some that I made by heating the brad, dipping in clear embossing powder and then dipping in the Martha Stewart glitter before the embossing powder dried. The felt shape came in the pack with the two previous cards felt shapes. The circle sentiment was a 12x12 sheet of circles with stuff on them, I think it is called Jenny Bolin or something like that.


These two are a little better in my book. The one with the skull and the word Spooky I do like for sure. The Skull and Spooky are rubons, they are Little Yellow Bicycle. The ghost one has a sticker that says "I'm Under Your Spell", the sticker was part of a sticker set.


I have to say these next two I do definitely like and are my favorites. I think I over embellished the others or something. I like the more simplistic look of these two.

Thursday, October 2, 2008

Treat card

I don't know what else to call this cute little thing other than TREAT CARD. I learned how to make this tonight at Stamp Club but we used Stamping Up punches. Since I don't have the punches I decided to make one with Design Studio.......shocking I know! *okie dies laughin*

This first photo shows how it looks all put together. The file has all the necessary cuts to make this, well without the scalloped edge on the wide ban, I did that with the paper trimmer at stamp club because that is what blade was in the trimmer. All the mats are labeled and there is a preview mat and also a reference mat for placing items on the treat card. I think if you wanted to use ribbon instead of the narrow ban it would look even cuter and pop dots on the scallop circle, but alas.......I did not have those things with me. You will need to use your hole punch to attach the ribbon at the top. Or I guess you could staple....oh what the heck, just go wild! HA HA HA


This next photo shows what it looks like from the side. So you see the sides are open. But I don't think that is a real problem. The candy is a small Hershey's candy bar, like the ones that come in a 6 pack. I think this would be cute made for a birthday or other holidays too!! The circle is approximately 1.5 inches I believe so there is plenty of room for small stamps.


This last photo shows the bottom and where you fold. The folding lines will be cut for you on the .cut file. It is very simple to make and can be made up so cute!!

If anyone makes one I would love photos to add to this post showing what all can be done with this file!

You can click the pictures if you would like to see them closer.

Wednesday, October 1, 2008

The last mailbox

This is my last one. The final one. There are no more. *okie says in dramatic voice and look on face.....then cracks up laughing*.

I used yet another K & Company stack for this one also. It does have prima flowers. The centers of the flowers I cut felt circles and then dotted with cinnamon Stickles.

The small butterflies are the Martha Stewart punch and the large is the Cuttlebug Tag Team. I did use Alcohol Inks on the top layer of the large butterfly. I used the lettuce and ginger, with a touch of copper additve and layered it over a brown butterfly. The small butterflies have turquoise stickles and a white gel pen on them.


The saying "Nature is the art of God" was part of the K & Company pack. Almost forgot....I added 3 buttons along the bottom and then cinnamon Stickles in the midde.

Well now that these are all decorated I must move on to something else........BUT WHAT?? HHmmm

Let me think. I have the 3 recipe books I want to do the 6 chipboard mini 4x6 albums, numerous greeting cards, Christmas centerpieces, oh yes I could go on and on and on. I have to have all this done by December 6th which is the date of my Annual Girlfriend Christmas party! OH DANG! Just remembered I still have to design and make the invitations! I think I better get busy! Anyone wanna come help???? please.......

Tuesday, September 30, 2008

Acrylic Magnetic Frames

Here are some quick things I did tonight. They are those magnetic frames for the fridge. I decided I wanted to decorate them up and will use them as gifts.

I used some rubons on two sets on the other I used some ribbon. And as you can see I flowered them all up.

Anywho I think these will make nice little gifts for people! And not expensive at all!!

Monday, September 29, 2008

And the 3rd mailbox

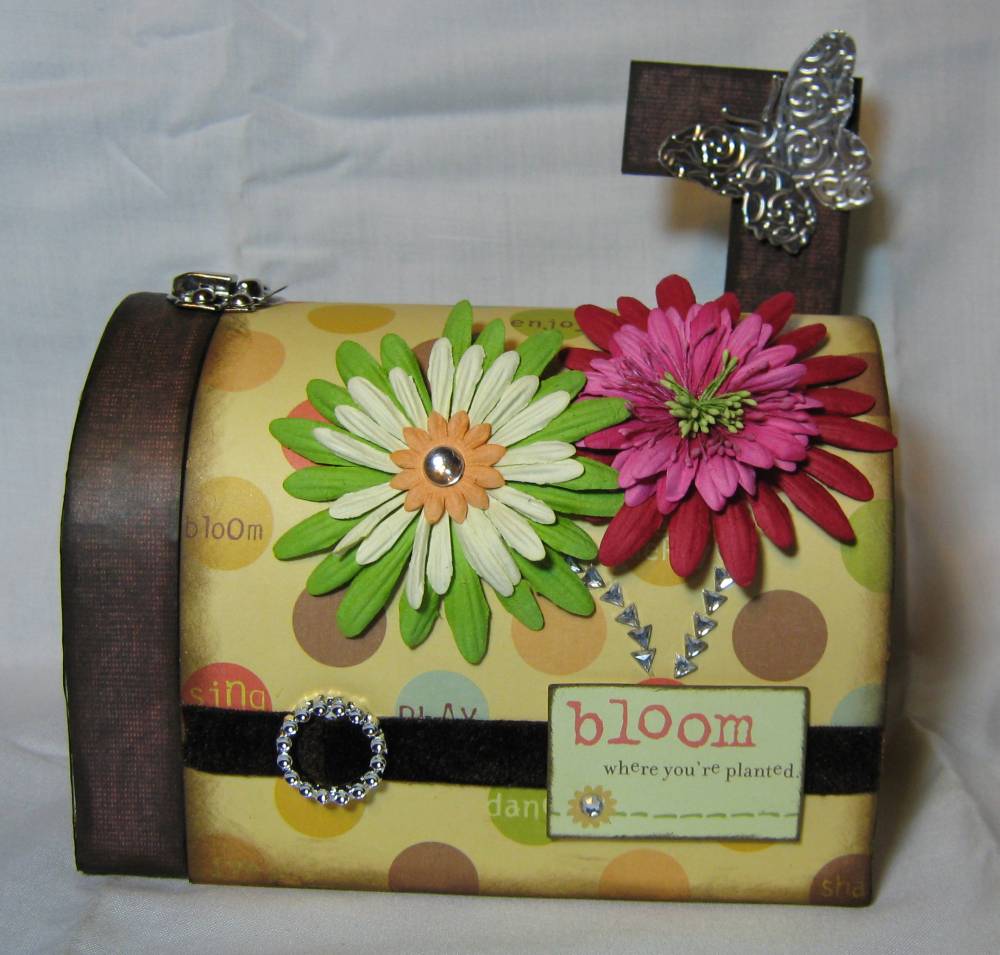
After this one I only have one more to do. WHEW! But wish I had about 10 more! These are just too fun to alter! I once again used a K & Company pack. I think this one is called Chocolat, but don't quote me on that. The butterfly is from the Cuttlebug Tag Team set and is cut from a foil pan. The flowers are Primas and I have a variety of bling used. The bloom where you are planted is from the K & Company pack. The brown paper on the front and the flag is something else, but I don't know what since I just used scraps I had. I used a ribbon buckle and some brown velvet ribbon which you might be able to see better if you click the picture.

I did mess up at first and had the words upside down on the side where the decorations were suppose to go but I just poked a hole and put the flag on the opposite side, easy peasy! And now no one will know! Well guess they will if ya'll tell them, but I know ya'll won't........will you?? *okie wonders*

I can't believe how fast these go. Had I started sooner tonight I probably could have gotten the other one done. Oh well as long as I get it done before Wednesday night before "Dirty Sexy Money" comes on I will be okay. I LOVE THAT SHOW!!

Sunday, September 28, 2008

Altered Mailboxes

I picked up a few mailboxes at my LSS that were on clearance. I made sure they were big enough to hold A2 greeting cards as I plan on using them as gifts for people.

This first one is using some Fancy Pants paper I had. I did darken the swirls that were on the paper by using a Fantastix and some Tim Holtz Distressed Ink. The flowers are Primas and the butterfly is from the Cuttlebug Tag Team set. I added rhinestones to the end of the swirls and in the flower centers.


This one is with a K & Company pack I have had for awhile now. The post cards and such are punchouts from the pack. I used some gingham ribbon and a prima flower at the bottom. The little butterfly is the Martha Stewart butterfly punch. I double layered the butterfly to add extra dimension.

Tuesday, September 23, 2008

Cricut Cart Box available for download

I have had a few requests for the cut file for the CRICUT CART BOX so I decided to post the file for download. The height is 2.5 inches. I am not going to lie and post measurements of the rest because I just don't remember and right now after adding my ladybug stamp to like 6 dozen or more cards I am just too darn lazy to go over there and measure them....don't ya appreciate my honesty? HA! The carts do fit in there snugly and won't fall out. I am really liking this storage solution for my purposes.

Someone asked what I did with my layovers and books.....well I don't use them since I use DS so they are in their respective boxes, and all stored in a big box that my friend LGuild gave me. THANKS LINDA!

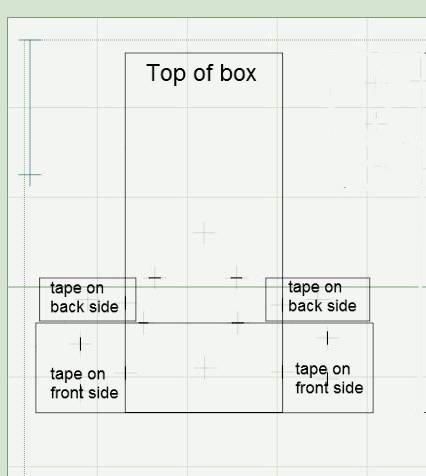
To assemble fold on all the scored lines, which will be cut for you. You can just line it up and fold, no need for a bone folder *is that what it is called?* for this. Apply adhesive *I used my ATG gun* to the side flaps on the back side and then apply adhesive on the front side bigger flaps.

Fold the smaller side flaps up and then fold the larger flaps to the back of the box.

If anyone has problems just let me know and I will cut one and take pictures of how to assemble.

Oh and I did use a corner rounded just because I thought it looked better.
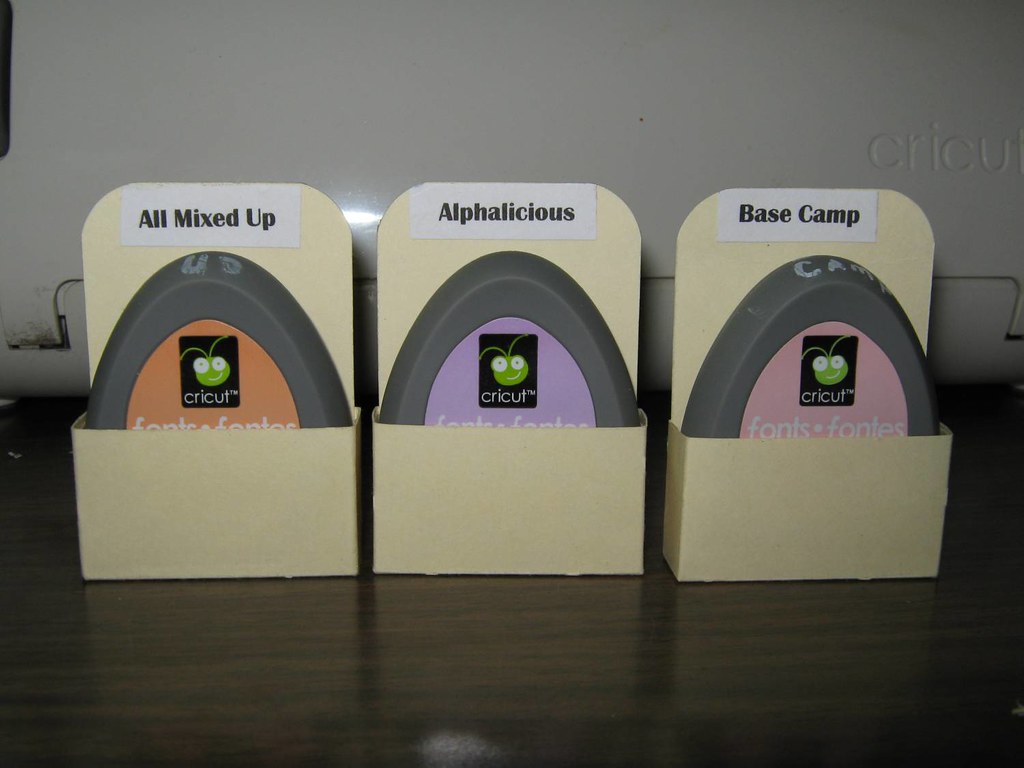
This file is made to cut 3 boxes at a time.

THE BEST STAMP EVER!

Well okay it is the best stamp ever if you like ladybugs and you are okieladybug!! *okie cracks up laughin*. Brandilynn from the Cricut MB pointed out this cute stamp to me a few months back and I loved it! I just kept looking at it and looking at it and decided I did need it! I will now be able to stamp all my cards and any swaps I do with this cute little stamp!! The stamp measures about 1 5/8 across. It is big enough to read and yet small enough that it doesn't overpower the back of a card.

If you would like a personalized stamp you can check out Stamp Out, which is the place mine came from. Lisa has a ton of stamps to choose from but she can also do custom work. She was very quick to ship!!

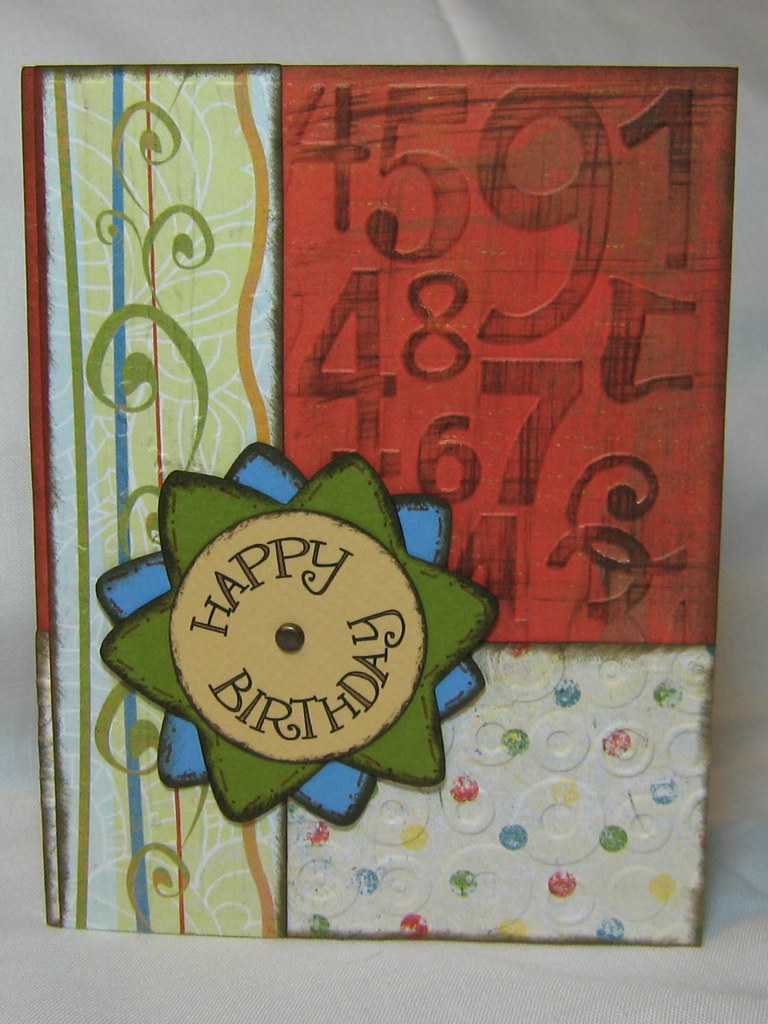
Sunburst Card

I didn't really know what to name this card and I had to name it something since I made a cut file for it. So I went with SUNBURST CARD. I made the file to cut 4 at a time since ya know by now I figure why make just one! I used only the George cartridge for this card. The file mats are labeled....PP means printed paper and SC means solid color. But of course you can do it however you want. I just needed to label it so I would remember. The LO came from PageMaps. You lay the full mat, then the bottom mat then the side mat.
I used the Numbers, Distressed Stripes and Spots and Dots *I think it is called* Cuttlebug folders.

The Happy Birthday was printed from the computer using MS Word Text art. I did the printer trick to get it to print on the circle. Which is I get it the size I need in Word, print it on plain paper, then used the herma dotta repostionable runner to tape the circle on top of the printing on the regular paper and then ran it through the printer again. I LOVE THIS METHOD!! Makes it nice when you don't have the just right stamp!

As you can see I used a small brad to attach the sunburst to the card. Oh yes, and I inked the edges but I bet ya'll surprised by that now are ya! HA HA HA!! It was pretty fast to put together and I think I like this one!

Sunday, September 21, 2008

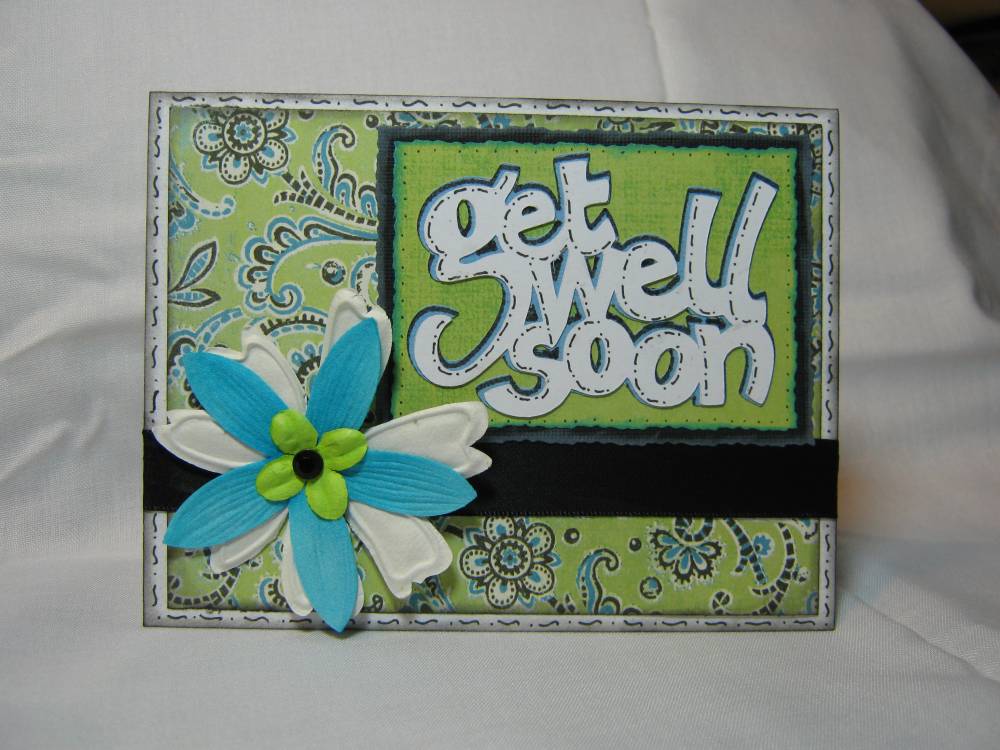
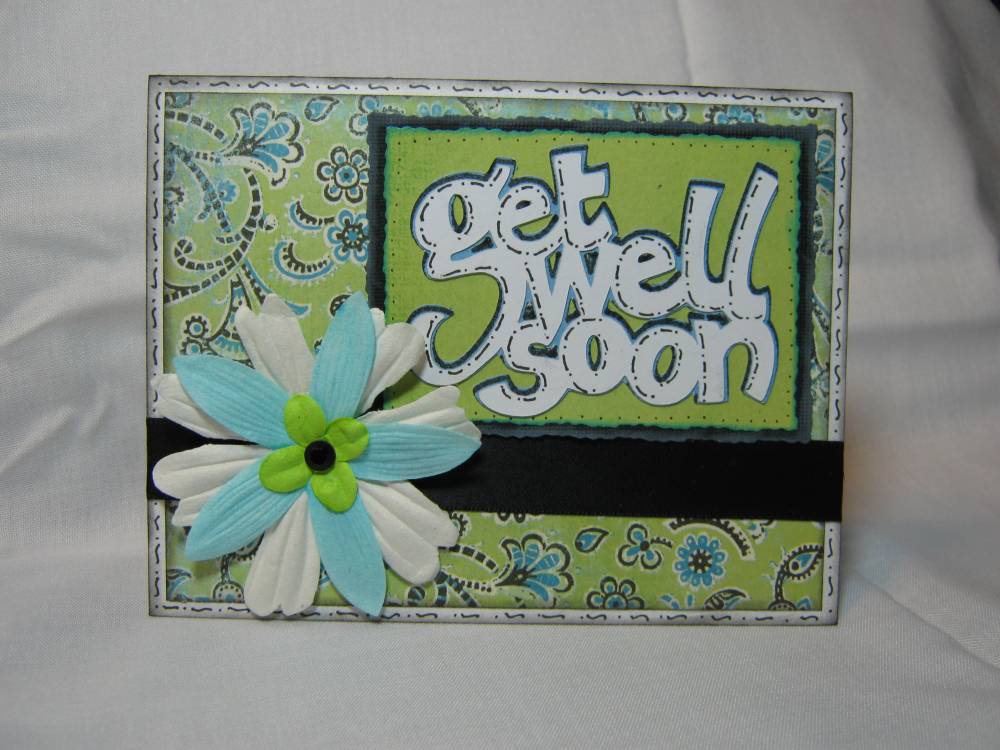
Get Well Soon

I don't really have any Get Well cards and with flu and cold season coming up I thought I should start making some.

I got 3 of these done tonight. I just kinda played around with paper and wasn't sure I was going to like it until it was all done. The Get Well Soon is from Beyond Birthdays. When I was thinking I wasn't going to like it my daughter came in and said "WOW! I LIKE THAT" so I decided I liked it to!! HA HA HA!!

I used some flowers that Tess from Paper Patch Crafts sent me. I layered a white, then blue and then added a little lime green flower. The black center on the flower is some kinda jewel thing I got in a bag of jewels years ago. The black band is satin ribbon. For the mat on the Get Well Soon I my Purple Cows cutter with the deckle blade, which is my favorite!!
I think this card is kinda cheery looking. I wasn't sure with using the black but I think it works. Oh the big mat is from a My Minds Eye stack, not sure if it is from Everyday Tango or from Magnolia, but it is from one of those.

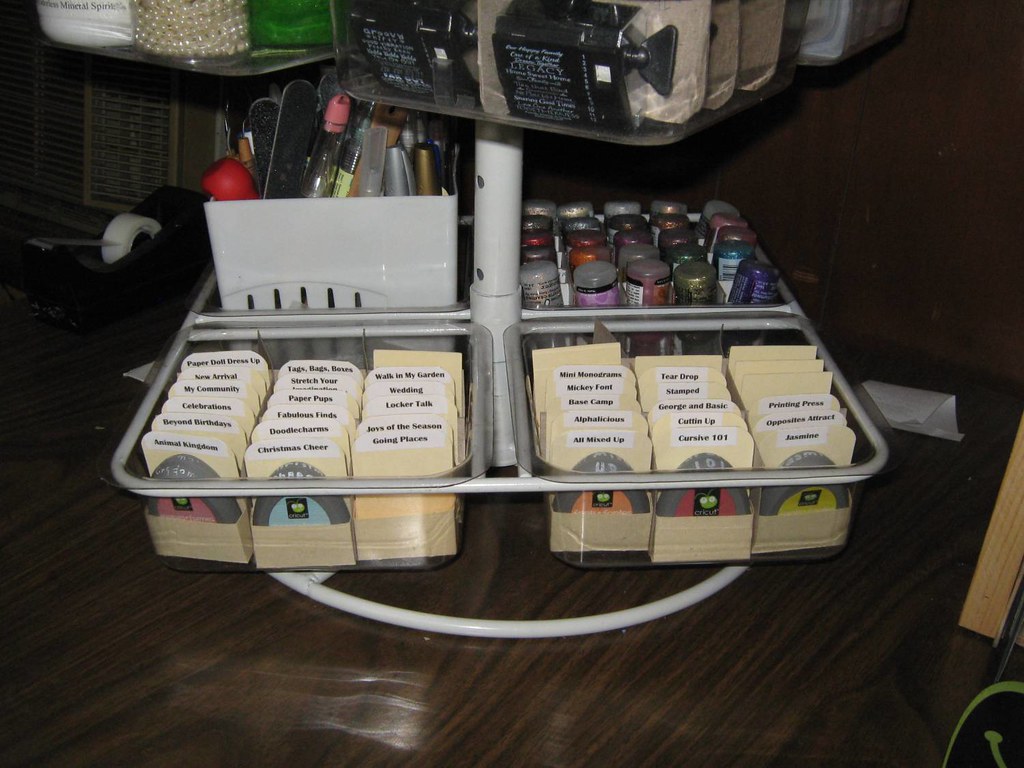
Cart Organziation....

I decided I wanted something neater for my carts and I wanted to see the cart name without having to lift up the pockets in my Plaid Spinner. You can click on the pictures to see them closer.

So I got busy on DS and designed this cart box to put my carts in. I had to do the names in MS Word and just print them and glue them on since I didn't have any little labels. I thought I did but not sure where they went to. I used some of the folders that LGuild gave me, since she gave me a whole box of them I had plenty to work with. I made some extras so when I get new carts I won't have to cut new boxes and will have them ready! Oh and I did use my corner rounder punch on them after I glued the names on the box.

Here is a close up picture of the boxes. As you can see they fit in there snugly and won't fall out. I think I am going to like this just fine!! I think the corners rounded look better than just the square corner and it wasn't a problem to use the corner rounder. The file folder is a good weight since it is heavy.

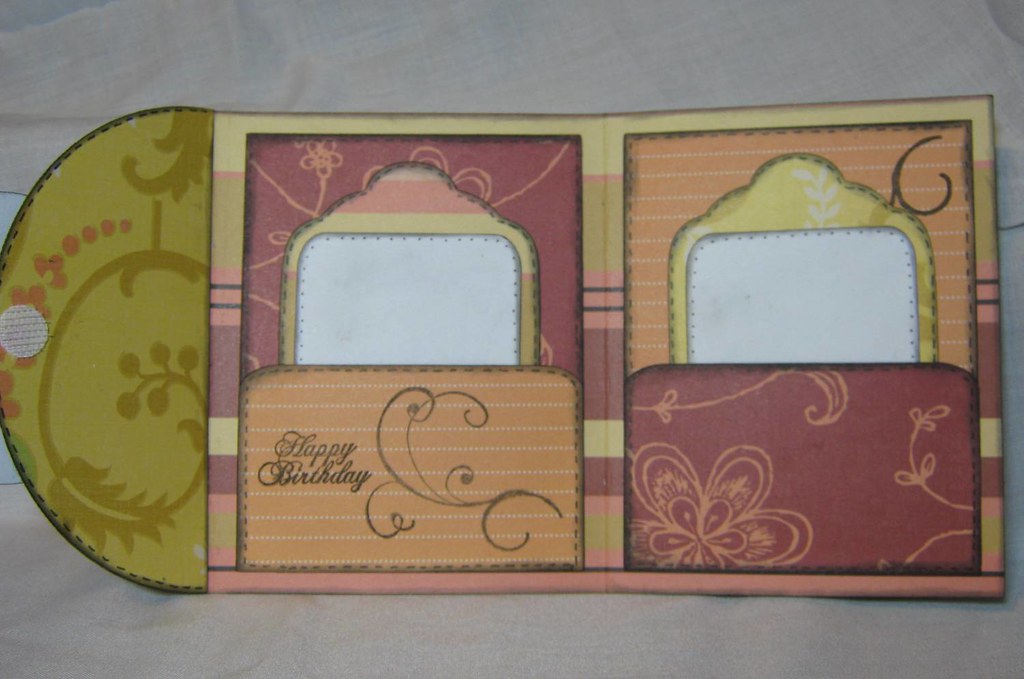
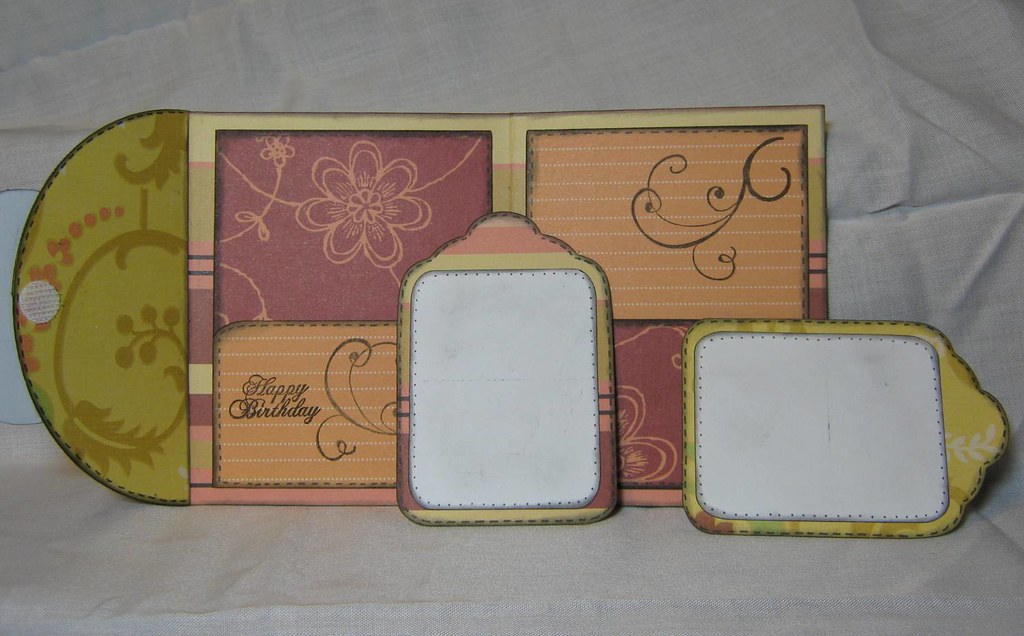
Return of the Pocket Card

I wanted to try my POCKET CARD as a regular card without all the ghosts and spiders so.....this is what I came up with. The paper is from a K & Company stack and the staying on the front was a punch out from the stack. I do have to admit I like this card. I know I know there are more things I could have done like sewing or embossing, etc........BUT I AM LAZY!! ARE YOU HAPPY NOW? I ADMITTED IT!! However....I did use some flourish stamps to jazz it up a little. The flourish is from an Autumn Leaves set.


Here is how the card looks open. As you can see I stamped on the inside too! The Happy Birthday is from an Inkadinkadoo Birthday Circle Stamp. Oh yeah and I doodled. I think I doodle just so I can say the word....it just kinda cracks me up!! *okie must have sniffed too much zig pen today because she is just down right talkin crazy now*. You can see the velcro dot on the left hand side of the photo, that is what I use to keep these little handy dandy card closed.

As you see the mats are blank. AND! there is a reason for this! *who knew okie had foresight, okie sure didn't* I plan on using this one for when I give a gift card. I can use the herma dotto repositionable runner to adhere a gift card to one of the mats and then I can use the other mat for writing my own personal birthday message.