First off - HAPPY INDEPENDENCE DAY!! Hope everyone has an enjoyable and safe 4th of July!
Years ago back when I was coming up with a lot of original files in Design Studio I made a card that I titled "Pocket Card". I honestly couldn't come up with a better name for the card. I was limited in Design Studio with what I could do since you couldn't import images, no splitting and removing images, and some things just wouldn't weld together. But now with using Make The Cut life is much simpler. I was looking through some old files and came across the Pocket Card and thought I would try to remake it in MTC since I really did like this card. It didn't take long and things can be moved around a lot easier than back in the ol days.
Here is a screen shot of the file I made for the Pocket Card. I once again used the "texture" feature in MTC which I am totally loving but not loving having to go find textures to download and put in files *okie doesn't like time consuming work but thinks she is a glutton for punishment since she seems to have a lot of time consuming things she does*.
The bottom base card doesn't need to be cut, it's just there to show how the flap has a cut for the front of the card, which will be easier to understand in the following photos.
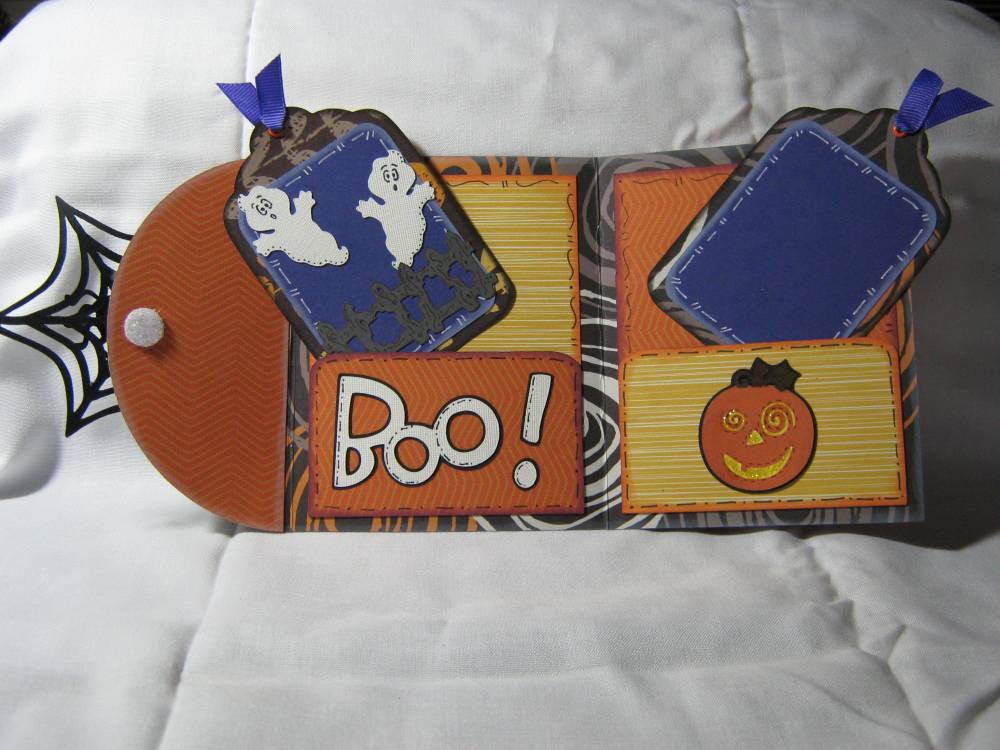
One of the original Pocket Cards I made was a Halloween Card. I used several different cartridges to fancy up the card *okie wonders if fancy up is really a term but decides she likes it and will let it stay* and this card shows how versatile the card can be. You can do more than just put a decorative piece for the flap, such as using a cut on the flap as well. The file available has a "mat" for the flap too.
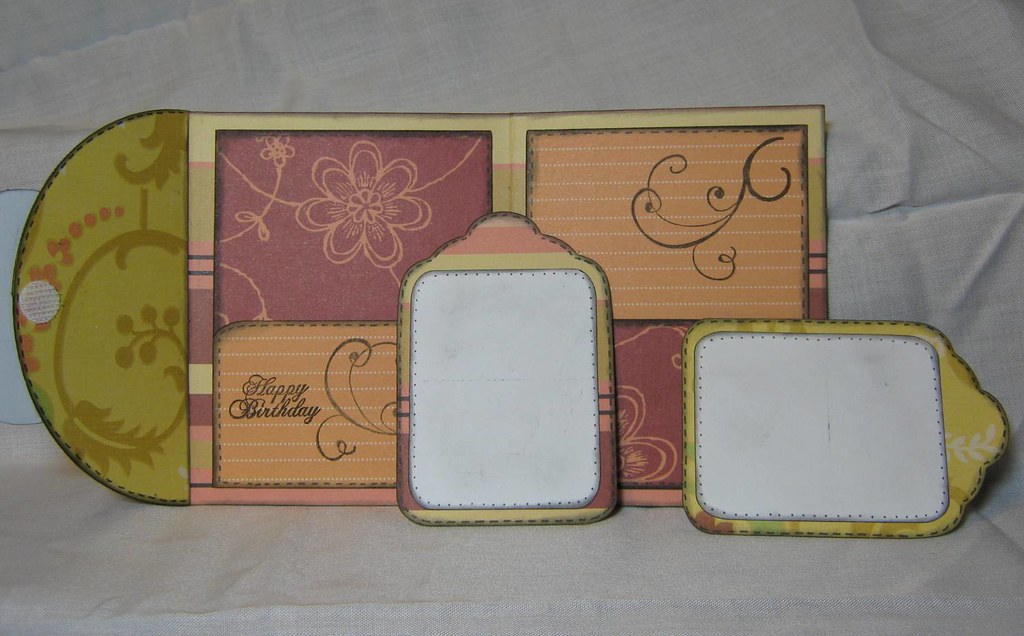
On the inside of the card I decorated one of the tags and left the other blank for a sentiment to be written on. It will also hold a gift card nicely. Even the little pockets can be decorated if you so choose.
The finished card when folded is the same size as a standard A2 card, 4.25" x 5.5" or at least close enough!
Download Pocket Card
Showing posts with label POCKET CARD. Show all posts
Thursday, July 4, 2013
Friday, March 4, 2011
Blast from the Past - Pocket Card
My first Pocket Card was a Halloween themed card. I have made several over the years and I love the little cards because you can add a gift card in there if you wish.
**************************************************
Originally posted September 21st, 2008
I wanted to try my POCKET CARD as a regular card without all the ghosts and spiders so.....this is what I came up with. The paper is from a
K & Company stack and the staying on the front was a punch out from the stack. I do have to admit I like this card. I know I know there are more things I could have done like sewing or embossing, etc........BUT I AM LAZY!! ARE YOU HAPPY NOW? I ADMITTED IT!! However....I did use some flourish stamps to jazz it up a little. The flourish is from an Autumn Leaves set.
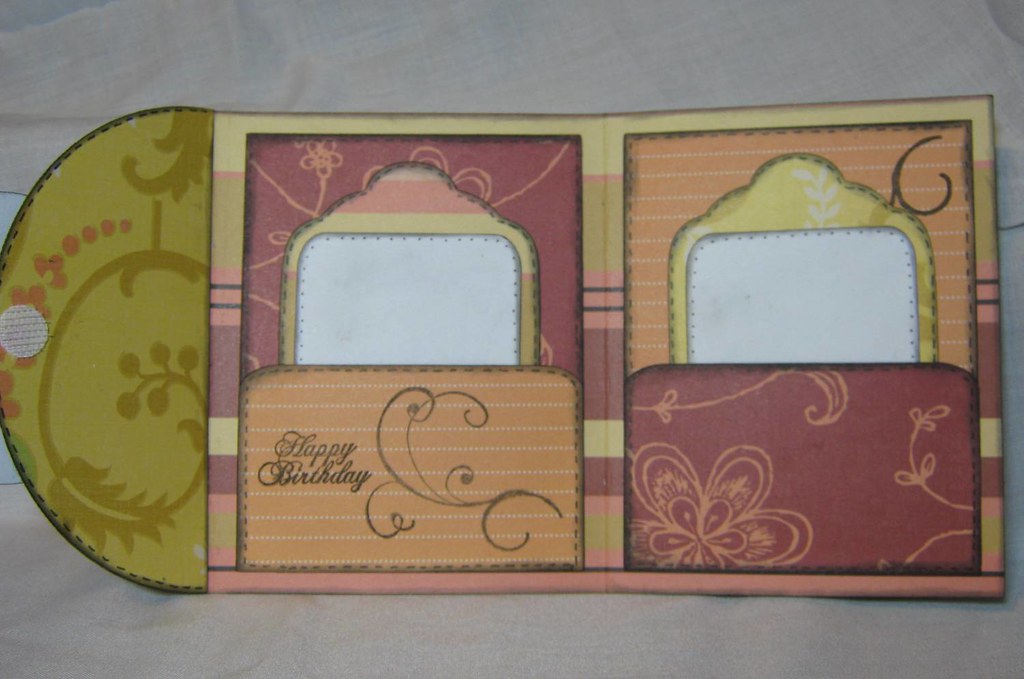
Here is how the card looks open. As you
can see I stamped on the inside too! The Happy Birthday is from an Inkadinkadoo Birthday Circle Stamp. Oh yeah and I doodled. I think I doodle just so I can say the word....it just kinda cracks me up!! *okie must have sniffed too much zig pen today because she is just down right talkin crazy now*. You can see the velcro dot on the left hand side of the photo, that is what I use to keep these little handy dandy card closed.
As you see the mats are blank. AND! there is a reason for this! *who k
new okie had foresight, okie sure didn't* I plan on using this one for when I give a gift card. I can use the herma dotto repositionable runner to adhere a gift card to one of the mats and then I can use the other mat for writing my own personal birthday message.
*******************************************************
It's the last full day on the cruise today and we will be at Half Moon Cay and having a beach party. I wish I could tell you all the fun we are having but since I have this post scheduled you will just have to wait until I get back to hear all the stories *okie slightly remembers telling a certain someone from ProvoCraft "what happens on the ship stays on the ship"* or maybe I won't be telling any stories! HA HA HA
**************************************************
Originally posted September 21st, 2008
I wanted to try my POCKET CARD as a regular card without all the ghosts and spiders so.....this is what I came up with. The paper is from a
Here is how the card looks open. As you
As you see the mats are blank. AND! there is a reason for this! *who k
*******************************************************
It's the last full day on the cruise today and we will be at Half Moon Cay and having a beach party. I wish I could tell you all the fun we are having but since I have this post scheduled you will just have to wait until I get back to hear all the stories *okie slightly remembers telling a certain someone from ProvoCraft "what happens on the ship stays on the ship"* or maybe I won't be telling any stories! HA HA HA
Friday, November 13, 2009
Fancy Card - Eskimo Kisses
Good day everyone! Today is Fancy Card Friday at Christmas With The Cricut. Barb aka Snowmanlover will be rounding out our week as guest designers tomorrow with the crafty gift. I have really enjoyed being able to post my creations for you guys and I appreciate all the wonderful comments! Make sure you check out Barb's Fancy Card at Snowmanlovers Paperie!
So for my fancy card I decided to make this POCKET CARD ESKIMO KISSES.
I have to be honest and give Tammy at CWTC for the idea. I had made a pocket card last fall and posted on my blog and she really loved it and suggested that I make one during my guest designer spot.
The great thing about this card is that the pockets are large enough to put a gift card in also if you so desire. I will be using some repositionable tape to add one to the blank tag.
The .cut file is set to cut 2 cards at once. All elements (ie, sentiments and tags) are adjustable and are easy to copy and paste if you are wanting to cut more than once. However the card base is not adjustable.
Feel free to change the wording or other elements
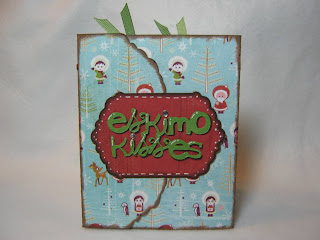
of the card to your own specific needs. I chose the words Eskimo kisses since the Basic Grey paper had Eskimo's on it. I do have the words "& holiday wishes" in the cut file that will fit on a tag but since my blade died on me I opted to use the stamped sentiment of "warm holiday wishes". Here is the front shot and also a close up of the inside where you can see the sentiment better. Remember you can click on the picture if you want to see closer detail *okie always likes to remind others of this feature*.
Step1 - You will want to gather your cuts and ink any edges before you
start to assemble. Then assemble the front sentiment and the sentiment block. I chose to use some Basic Grey magnets to help keep the card closed. I applied one in between the sentiment layers and placed the other one on the back side, closed the card, marked where the magnet should be and then placed it between the inside mat and card base *okie things this might need to be a video in the future*. I promise it is not as complicated as it sounds. I have used velcro dots as closures also. It all just depends on what you are wanting to do.
Step 2 - Apply the mats to the card base. I added faux stitching with a Stampin Up
marker at this point. You may not want to decorate the mats too much since they will be covered with the pockets and the tags. I thought about using the Cuttlebug but I couldn't bring myself to squish those cute little Eskimo's!
Step 3 - Add ribbon to your pocket cuts before adhering
to the mats, this way you can clip the ends easily. I added faux stitching with a Signo UM-153 white pen. I used my ATG gun to adhere the pockets and it has the 1/4" tape. You will want to be careful to stay to the edges so you allow for the tags to be inserted later. Also remember to only do the sides and bottom. If ya do the top...well...the dang tag won't go in!! *okie laughs at self because she almost did this*.
Step 4 - Assemble your tags and decorate as you wish.
Again I thought about the cuttlebug but since I am leaving one blank for either adding a gift card or writing a short note I decided against it. I pulled ribbon through the holes at the top and then added brads to keep the ribbon in place.
Step 5 - Add your sentiment to one mat, you can either use the one that is
included in the cut file, make your own or do as I did and stamp then emboss! *okie loves embossing powder*.
While the card may seem complicated it really is easy to go together and can be decorated in so many ways!!
So for my fancy card I decided to make this POCKET CARD ESKIMO KISSES.
I have to be honest and give Tammy at CWTC for the idea. I had made a pocket card last fall and posted on my blog and she really loved it and suggested that I make one during my guest designer spot.The great thing about this card is that the pockets are large enough to put a gift card in also if you so desire. I will be using some repositionable tape to add one to the blank tag.
The .cut file is set to cut 2 cards at once. All elements (ie, sentiments and tags) are adjustable and are easy to copy and paste if you are wanting to cut more than once. However the card base is not adjustable.
Feel free to change the wording or other elements
of the card to your own specific needs. I chose the words Eskimo kisses since the Basic Grey paper had Eskimo's on it. I do have the words "& holiday wishes" in the cut file that will fit on a tag but since my blade died on me I opted to use the stamped sentiment of "warm holiday wishes". Here is the front shot and also a close up of the inside where you can see the sentiment better. Remember you can click on the picture if you want to see closer detail *okie always likes to remind others of this feature*.
Step1 - You will want to gather your cuts and ink any edges before you
start to assemble. Then assemble the front sentiment and the sentiment block. I chose to use some Basic Grey magnets to help keep the card closed. I applied one in between the sentiment layers and placed the other one on the back side, closed the card, marked where the magnet should be and then placed it between the inside mat and card base *okie things this might need to be a video in the future*. I promise it is not as complicated as it sounds. I have used velcro dots as closures also. It all just depends on what you are wanting to do.Step 2 - Apply the mats to the card base. I added faux stitching with a Stampin Up
marker at this point. You may not want to decorate the mats too much since they will be covered with the pockets and the tags. I thought about using the Cuttlebug but I couldn't bring myself to squish those cute little Eskimo's!Step 3 - Add ribbon to your pocket cuts before adhering
to the mats, this way you can clip the ends easily. I added faux stitching with a Signo UM-153 white pen. I used my ATG gun to adhere the pockets and it has the 1/4" tape. You will want to be careful to stay to the edges so you allow for the tags to be inserted later. Also remember to only do the sides and bottom. If ya do the top...well...the dang tag won't go in!! *okie laughs at self because she almost did this*.Step 4 - Assemble your tags and decorate as you wish.
Again I thought about the cuttlebug but since I am leaving one blank for either adding a gift card or writing a short note I decided against it. I pulled ribbon through the holes at the top and then added brads to keep the ribbon in place.Step 5 - Add your sentiment to one mat, you can either use the one that is
included in the cut file, make your own or do as I did and stamp then emboss! *okie loves embossing powder*.While the card may seem complicated it really is easy to go together and can be decorated in so many ways!!
Sunday, September 21, 2008
Return of the Pocket Card
I wanted to try my POCKET CARD as a regular card without all the ghosts and spiders so.....this is what I came up with. The paper is from a
K & Company stack and the staying on the front was a punch out from the stack. I do have to admit I like this card. I know I know there are more things I could have done like sewing or embossing, etc........BUT I AM LAZY!! ARE YOU HAPPY NOW? I ADMITTED IT!! However....I did use some flourish stamps to jazz it up a little. The flourish is from an Autumn Leaves set.
Here is how the card looks open. As you
can see I stamped on the inside too! The Happy Birthday is from an Inkadinkadoo Birthday Circle Stamp. Oh yeah and I doodled. I think I doodle just so I can say the word....it just kinda cracks me up!! *okie must have sniffed too much zig pen today because she is just down right talkin crazy now*. You can see the velcro dot on the left hand side of the photo, that is what I use to keep these little handy dandy card closed.
As you see the mats are blank. AND! there is a reason for this! *who k
new okie had foresight, okie sure didn't* I plan on using this one for when I give a gift card. I can use the herma dotto repositionable runner to adhere a gift card to one of the mats and then I can use the other mat for writing my own personal birthday message.
Here is how the card looks open. As you
As you see the mats are blank. AND! there is a reason for this! *who k
Sunday, September 14, 2008
Pocket card........Halloween!!
I had made this POCKET CARD file some time ago but just got around to using it last night. I am still using some of the scraps my LSS owner gave me so I decided to make another Halloween card...because I SEND SO MANY *okie rolls eyes at self and wonders why she keeps making them since she has never sent a Halloween card before in her life*. I just sized my objects to the where I was going to use it on the card then copy and pasted onto a new mat for making the Halloween version. But the version for download is just a plain version. So you can add what you like, or add nothing at all.......totally up to you! *okie hopes everyone likes the versatitilty of the card files she makes*
BUT!! If you want to make this particular card you can download the POCKET HALLOWEEN CARD. All of the work is done for you! *okie grins big* The carts used are George, SYI, PDDU and Paper Pups. If you don't have all of those then you can just delete what you don't need and add what you do.
So anyway here are the photos.
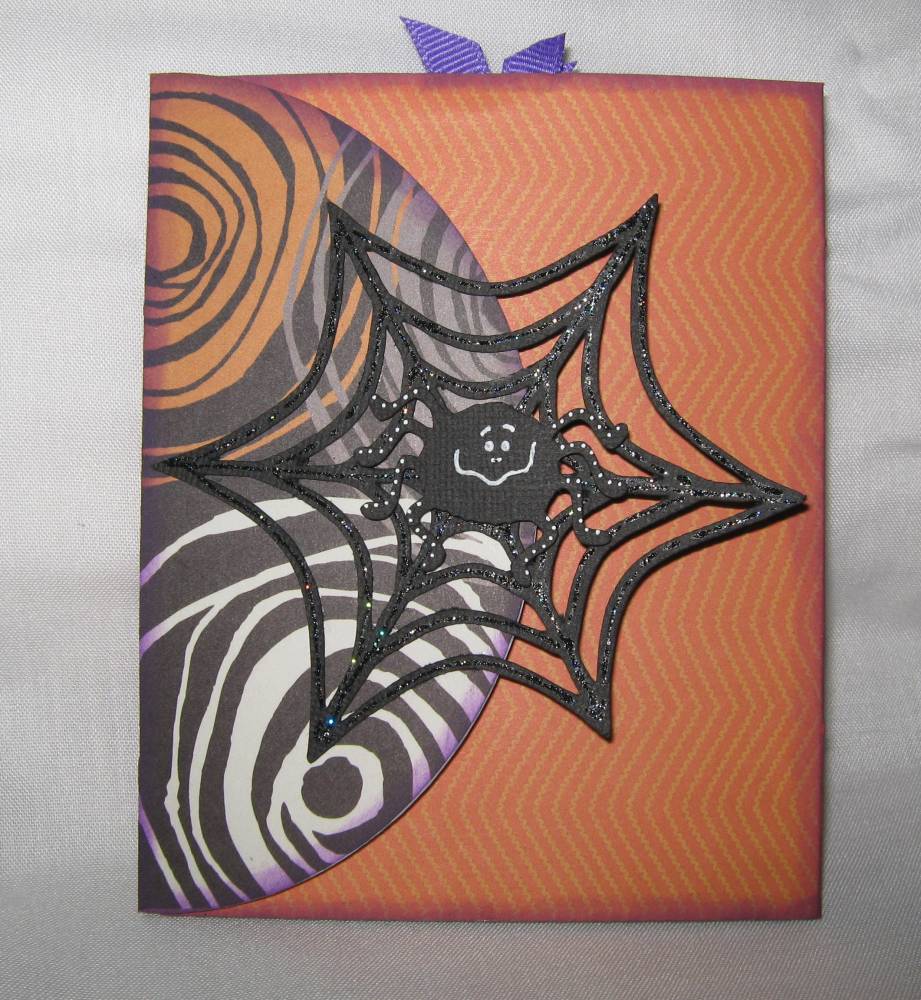
I used Paper Doll Dress Up for the web and the spider. I did add a pop dot under the spider. OH yeah.....this is an A2 card so fits in a standard size envie. But with all the stuff it will require extra postage because it is over 1/4" thick. I used a velcro dot to keep the card closed and added some Scotch 2 way glue to make the card stay closed.
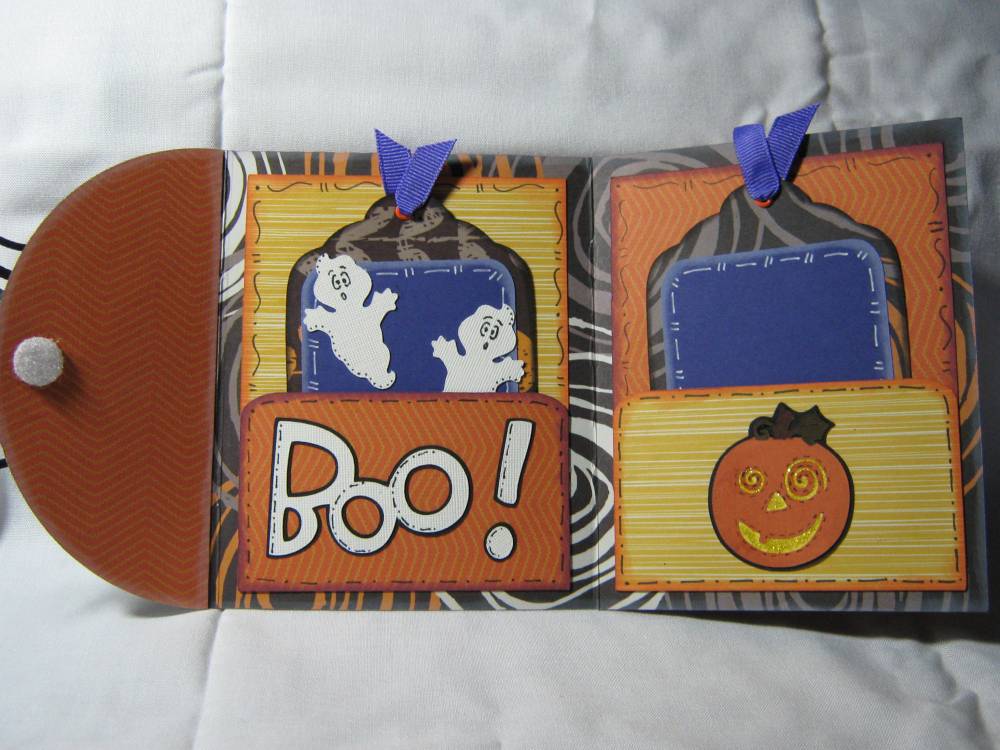
This is how it looks opened up. I us
ed Paper Doll Dress Up for the Ghosts and fence. The jack-o-lantern is with Stretch Your Imagination and the BOO! is from Paper Pups. And I doodled, then I doodled, and then doodled a little more HA HA HA! Of course I had to ink it! My two staples of scrapping and card making.....INK AND STICKLES! LOL
Here is what it looks like with the ta
gs pulled out. Now you can see the fence. I left one tag blank so writing could go there. The mats and ribbon are purple, but kinda look blue to me in the photo.....WHAT IS UP WITH THAT?? You can see the velcro in this picture. Oh if you click on the picture it will show the larger version and you can see the detail better, especially the fence.
Anywho....hope ya'll enjoy the card!
BUT!! If you want to make this particular card you can download the POCKET HALLOWEEN CARD. All of the work is done for you! *okie grins big* The carts used are George, SYI, PDDU and Paper Pups. If you don't have all of those then you can just delete what you don't need and add what you do.
So anyway here are the photos.
This is how it looks opened up. I us
Here is what it looks like with the ta
Anywho....hope ya'll enjoy the card!
Subscribe to:
Posts (Atom)