
 Supplies Used:
Stampin Up Stamp Caseas
Various Cricut Cartridges
Make The Cut Software
Clipart from Internet
Border Punches
Stampin Up Patterned Paper
Making Memories Breast Cancer Paper

I thought Kimmy was going to spaz out when she saw others open these prizes as she kept telling us she is "the queen". At one point I told her "uh, no you're not" and she told me "I am the queen of my school and the queen of *okie can't remember the name* (some beach resort)" to which I responded "uh well you ain't the queen of my house". I know someone did trade prizes with Kimmy so she could have one of these notepad cases, which was very sweet of them.
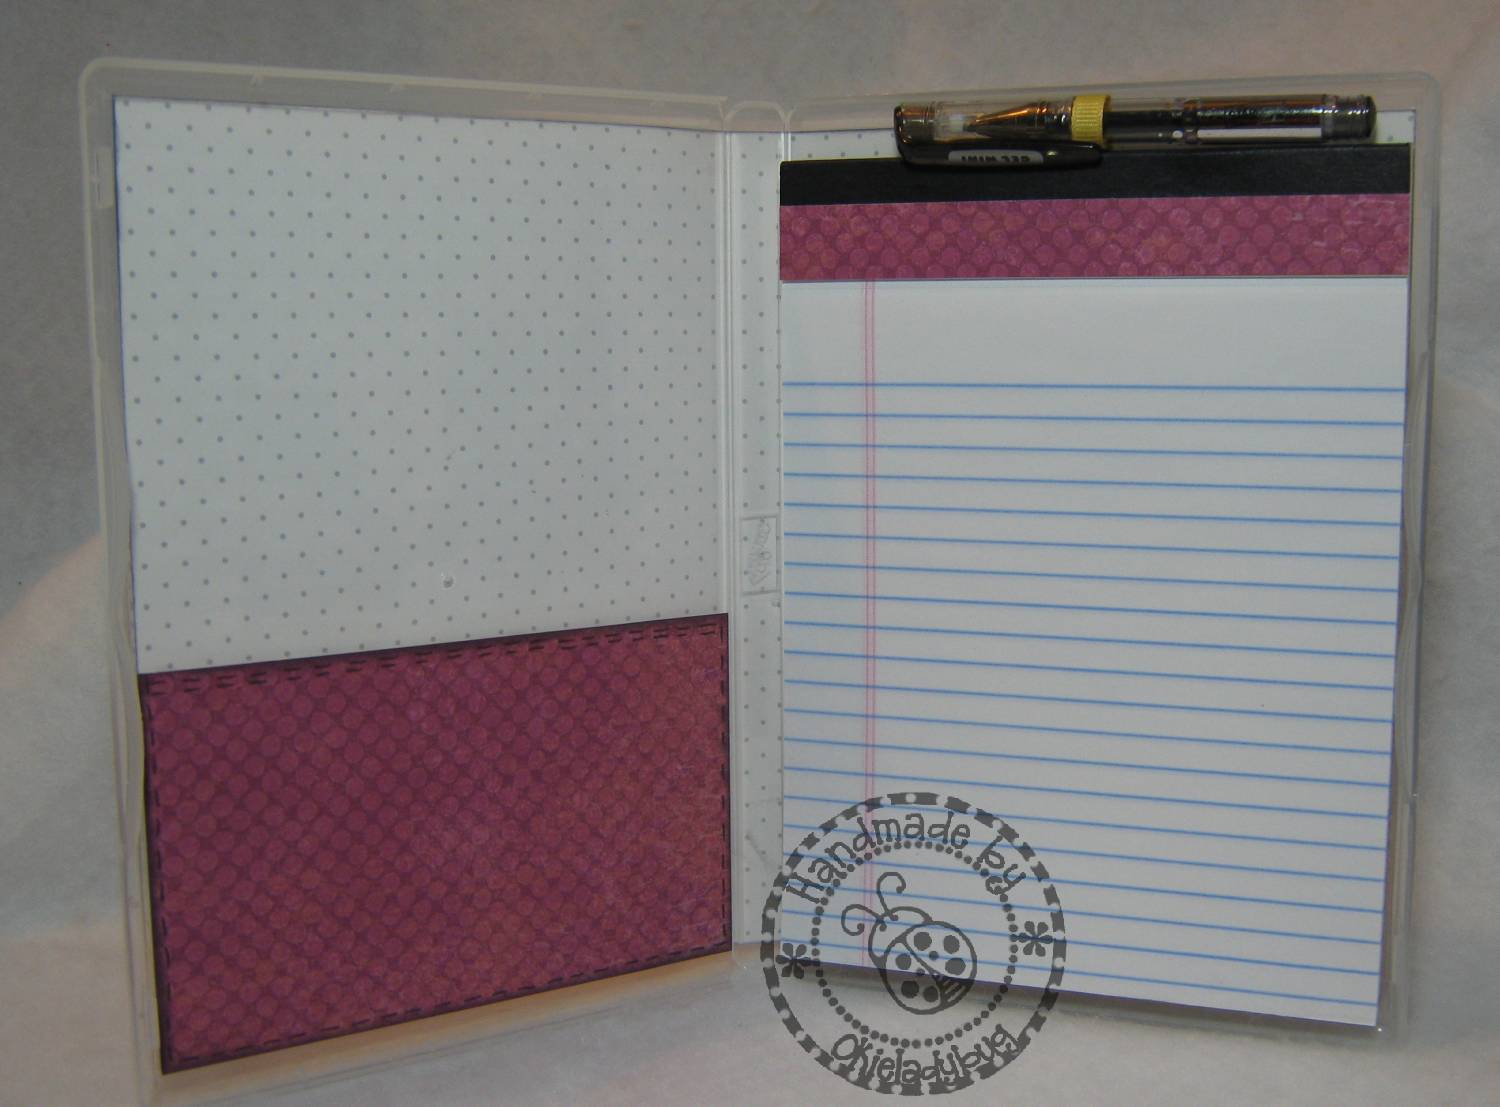 I used ribbon to make a loop at the top to hold the mini
gel pen, which can be found at Staples, and then just used ATG tape to
attach it to the stamp case.
I used ribbon to make a loop at the top to hold the mini
gel pen, which can be found at Staples, and then just used ATG tape to
attach it to the stamp case. Double sided paper works wonderful on these cases so there is a pattern to show on the inside of the case. I accented the notepad with a strip of the paper I used to make a little pocket.

I finally used the Daisy punch I have had forever and hadn't used to make a strip to divide the patterns of the paper. The word Believe is from either the Cricut cartridge Home Decor or Home Accents. I used MTC to make a double shadow on the word to make it pop a little more.


The words, labels and strip are stickers that came with the paper and although I generally don't like stickers I did like them for this occasion. There isn't a lot of dimension that can be used on the cases due to the nature of the case so flat embellishments work great. I did use a punch for the loopy border.
 One of the packs of paper I got was specialty paper and I used one of the scallop sheets to embellish the inside of these notepad cases.
The double sided paper really shows well on this one with the breast cancer ribbon being on the inside.

These were a lot of fun to make and all the guests really seemed to like them. I think I might have to make some more of these to have on hand for last moment little gifts.
Those are lovely!! TFS!
ReplyDeleteThese are fabulous gifts - what a neat idea. TFS
ReplyDeletevery nice! thanks for sharing :)
ReplyDeletevery, very cute!!! love them.
ReplyDeletethese are great gifts, love them
ReplyDeleteI love these Shirley! Did you put the papers on the inside too or is it just showing through to the inside from the outside? I only ask because I thought you said that you made a pocket?? Sorry for not quit understanding. lol
ReplyDeleteThe paper is between the hard plastic and the outer sleeve. I did put a little paper pocket on the inside of the case. I didn't really do much of a tutorial on it but there are a lot online. I was just trying to hurry up and get them posted since I haven't been posting anything crafty lately LOL.
ReplyDeleteYou could always send that extra one to my house ! Ha! Love them !!
ReplyDeleteAnna
I love this idea! Very creative! They are so dang cute that I would never write in it! Thank you for sharing!
ReplyDeleteThis is a great idea!!!! I am going to put this on my To Do List. Thank you for sharing your ideas!!!
ReplyDelete