


 use the face to make some cards, but I think they will have to wait until next year to send these out since they are quite a bit of work and right now I have so little time *okie always has so little time*. The wreath is from the same cartridge. I was able to cut 6 at a time and I also was able to use the new "hide contour" feature that was included in the latest Design Studio update and save some paper that way. I will have to use him on a 5x7 card since I cut him a little big.
 just had to try it out on something. Well of course I had to make a few more Christmas cards using it, a few....8 to be exact. HA HA HA The font is Santa's Sleigh and it is SSOO AWESOME!! I did the wording on Microsoft Word and cut it with my 1.75" circle punch. The image in the middle is a Studio G. The scallop circle is from Mini Monograms cut at 2.5". The lacy border is the double arch punch. I did add a few stickles to the card to, they will look better when they are dry.
 for a swap that I had joined and thought I would share the cut file. The file will cut 4 at a time. Actually I did have it set to cut all the ornaments but deleted 16, I doubt anyone wants to make 20! LOL The bread tag is with Fabulous Finds cartridge and the ornament is with Joys of the Season cartridge. The overall size is roughly 2.5 inches wide by 5.25 inches tall.
 I will call it SNOWFLAKE WARMEST WISHES. I think it is kinda funny to put a snowflake and then give warm wishes. HHMM...this might be a good card for my northern friends and family!
 it but didn't want to use all my pink bling on the cards. I have tons of the clear bling that I bought in a tube at Wal-Mart in the wedding section. I actually used superglue to keep the bling on the card. So far it is holding well. Yeah I know.....it probably isn't acid free but figure people won't keep these forever anyway.
 cut file. The file has a whole pie and a pie slice on it.
 end up with on the whole pie cut file. As you see the whole pie is there, the pie crust rim and the pie pan.
 take a screenshot of the individual pieces *okie wonders if anyone will think she is just to lazy to go back and take the screenshot.....because she is* , and I think they are on two mats, and the mats are labeled. Again the screenshot was taken with pieces unwelded to show color, but they are welded on the file. I double checked!!
 MB how there is a shortage of food type items and thought I would make a couple of .cut files. This one is GRAPE CLUSTER and is fully adjustable but there is a little trick to adjusting. It is made with George. This first screenshot I made so the colors would look better and you could get an idea of the overall effect.
 When adjusting the image follow these instructions:
 And thought I would give more clear instructions for this. It seems this one is a favorite of my readers.....and a favorite of mine also!!
 Now to avoid cutting the whole mat in your base color you can do the following. Use a piece of cardstock at 6 inches to about 9 inches. Lay it on the mat where the card will cut, using your grid lines on your mat as your guide. Now cut a piece of cardstock for the Holly leaves at 6 inches and 2 inches wide. This way the items cut at the same time.
 only then cut 2 pieces of cardstock at 6x5 inches and place them on the mat as shown, using your gridlines on your mat as your guide. Then cut a piece of cardstock for the holly at 6 inches by 2 inches, again using gridlines as a guide. The whole mat will cut at once and it will save time.
 I would play with a HAPPY HOLLY DAYS wordbook. I used George for the base shape and Storybook for the lettering. I haven't cut this but I did check it several times to make sure everything is welded. I did do some tweaking after the screenshot was taken. I filled in the areas on the happy and days since it is kinda curly and thought it would be easier to cut. I have mats for the letters to be cut in different paper to be adhered to the base. I might try to cut this this weekend, depends on what else I need to get done. Anyway thought I would post it in case someone wanted to use it.
 ago and never cut it. With the next holiday being Valentine's Day I thought I would post this cut file for the LOVE WORDBOOK for those who would like a quick cut file for the heart o' heart holiday. The base letters and inner letters have a mat also if you would like to cut those. The book is 4 inches tall by about 6 inches long...well 7 1/4 if you count to the end of the E. It is all done with George.
 I think this one will be nice nice nice!! There is a mat to do the shadow letters if you want them in a different color than your base of the pages and also there is a mat for the regular letters.
 This file will cut two at a time. The tooth fairy should leave at least 5 bucks for these beauties! HA HA HA
 now that she only cracks herself up, but continues to do so because she likes to laugh*. I made a CROCKPOT at the request of a Cricut messageboard member. She was wanting it for a recipe swap she was in. Since enough time has passed and the swap is certainly over I thought I would post the file on my blog for download. There are a couple of mats to this one and they are all labeled.
 I had made. I can't remember who asked me to make it for them since it was almost a year ago but thought I would post the file for download. The file is SNOWSHOES and are designed with the old fashion kind in mind. The shoe comes out to be about 4 1/2 inches long and about 1 1/2" wide. You will need to clip the "mesh" after attaching it to the frame. Also you will have to cut the mesh twice, I was too lazy to copy and paste all the x's again but both of the frames will cut at the same time.


 Well this is a version of that card. I got a set of Stampin Up Christmas stamps, circa 2005 for a really good price last weekend. There were 8 little stamps in the set. I used the Stampin Up ticket punch on the corners. I used a 1 1/4" square punch to punch out the images after I stamped them. The mats are done with the Cricut Stamped cartridge. The words Merry Christmas and Seasons Greetings came from the Wild Card cartridge. A very dear friend of mine gave me Wild Cards and Storybook as a Christmas present and I was so excited I thought I needed to try them out. I haven't tried Storybook yet.....but I will soon!!
 This is me, Scrappinbee, ScrapperDelighted and my BFF Karen that I talk about frequently. As you see we had to make a trip to Sonic before Wal-Mart LOL.


 This is the cover of the album. The chipboard pieces are 4x6 inches. Using Design Studio made it very handy to make sure I had the sizes of my objects right for cutting. I used the Martha Stewart branch punch to add some decoration along with the Merry Christmas. The title has diamond stickles on it. The small dots on the branches are Robin's Nest embellies.
 together with the cut outs as much as possible. I am including a piece of white cardstock that can be removed and used as a pattern for cutting pictures to fit on the mat. The present is made from some Bazzil Bling paper that I had. The tree is decorated with Robin's nest Embellies and some Stickles.
 cocoa but for some reason they wouldn't cut. The Cricut would start to cut them and then just sit there. I decided to make something look like a sugar cookie. HOWEVER.....a bunch of the MB sisters decided that it looked like an alien eating a cookie. They are no longer on my Christmas list!! *actually okie has no one left on her Christmas list at this time and has no idea what to do with all the cards she has made*I used a light green metallic paper for the cup, hard to see here and then added some white fuzzy sticker to dress up the cup a little. The cookie is with green Bazzil Bling and Stickles.
 that had sticker on the back. It added a great touch to the stocking and Santa's hat. I used the D'vine swirls cuttlebug folder on the stocking and added some Robin's Nest embellies.
 Mica paper for the base of the ornament. On one I used the branch punch and the other I used a puffy reindeer off some ribbon that I got from the LSS.
 You can say you don't like the taste of gingerbread but no one can deny the beauty of gingerbread when it is decorated! Even if it is paper and Stickles!! HA HA HA I did do some doodling with a white gel pen also.
 Well I used my stamp.....and as you can see I messed up a bit...OOPPSS!! Think that happens to all of us sometimes doesn't it! LOL
 I used some Prima Hydrangea flowers and some Kaiser pearls. The pictures and wording are from a K & Company pack that had punchouts. The beautiful ribbon is some that my friend Theresa from the cricut MB sent me.


 ok like.....well not all of them but these pages anyway *okie is beginning to think she needs to stop posting after 10pm as she doesn't even know if she makes sense*. This is the gingerbread pages....click the photo to see it bigger.
 and Christmas tree. I used stickles OF COURSE on the tree but then added some Robin's Nest embellies for ornaments. I think they turned out nice. For the stocking I did run it through the cuttlebug using the D'vine swirls folder. For the cuff I used some fuzzy stuff that Grammat sent me. I dotted the swirls with a white pen and also added some silver Robin's Nest embellies on the cuff.
 remember to click the pic if you want to see more detail. The fuzzy stuff cut great with the cricut. It didn't cut through the backing but it did cut through the fuzzy stuff just fine. The paper is some Mica card stock I got at the big stamp sale, not sure if I bought this color in the spring or this fall, or the other night during stamp club....but that is where it came from. I know I saw some at Michaels the last time I was there, think it was in 12x12 sheets.
 bread. I got the house from JOTS *okie thinks that is what it
  was....she can't remember right now* and the Gingerbread man from Stretch Your Imagination.
 She wanted one of them and thought I might want the other. It is an old iron bed, probably close to 100 years old, that one of my aunts had spray painted a hideous gold color. I used a brown hammered metal and it turned out a lot better! The springs are beyond their prime but I think I can make it work with some ingenuity. There are some dents and dings in the metal posts, and there is a slat missing in the footboard....but it was grandma's so I love it just the same!
 I don't know the name of the stamp. I stamped the image on Georgia Pacific cardstock and then used a fiskars oval template I had to cut it. I colored the image with Stampin Up markers from the earth elements set. The mat cardstock is Fancy Pants, the name is Flurry and is from the Holly Jolly collection.
 I am not sure what stamp set the images are from, but I have seen it in the catalog I think. If not then I have seen one similar.
 Well not with the Give Thanks stamp, but the chef and turkey anyway. ADORABLE!! I colored him using my SU markers. I stamped him on some paper for the pants and then cut out the rest of him and cut off his pants and put them on the colored paper. I am not too pleased with this but it will do for someone! HA HA HA
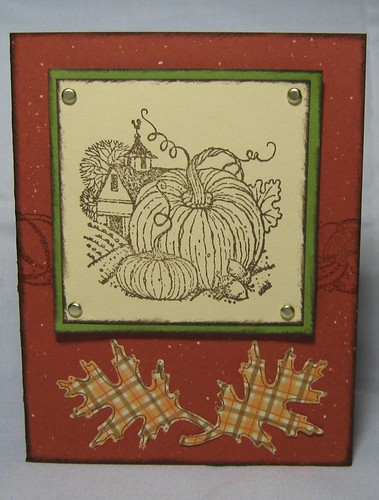 I think it is called Harvest Home or something like that. I inked the edges after I got home and also added the leaves to it. We used a roller stamp on it but you can't really see it.
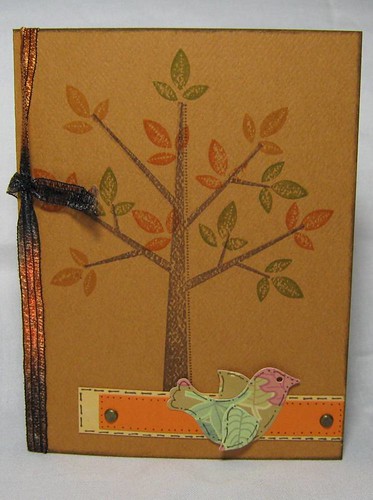 SU catalog and really liked the looks of it, but I like it even better after using it!! I think it has a lot of possibilities for sure!!
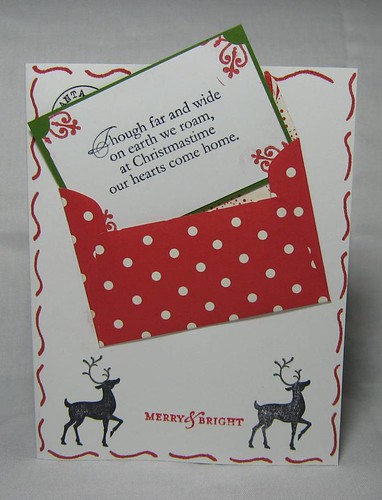
 I got some of the $1 candles from Wal-mart that have the cute little glass lid for the candles....but also thinking I could use them for storage afterwards. So for now I am using them for buttons. Of course I have to burn some more candles to organize the rest of my buttons....man is my house gonna be smellin good! HA HA HA
